Just a quick posting as promised version 2 this is more old fashioned style racket I thought the brown beaded frame looked a bit like wood. This was created using czech size 9 seed beads the handle is in an ivory matt and the frame in a silver lined transparent brown with a slightly cloudy / milky semi transparent (not sure what colour you would call it) bead for the strings.
 This one measures approximately 40mm x 20mm and depth is 5mm.
In tribute of Wimbledon I decided to bead a tennis racket. After Googling for a possible pattern and being unable to find what I had in mind. I turned to creating my own design in 3D right angle weave. I was quite happy my creation as it turned out pretty much how I expected.
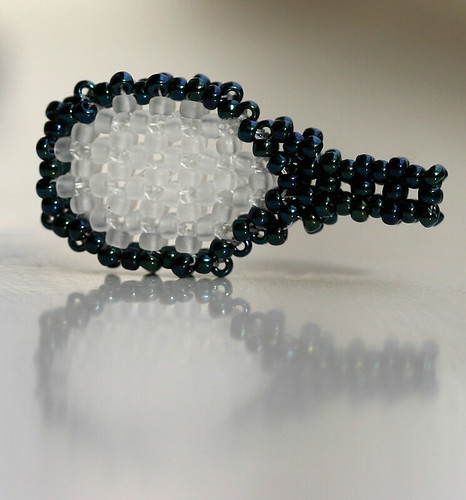 I used size 11 metallic nebula blue toho seed beads for the frame and crystal frosted toho seed beads for the strings. It measures 35mm x 15mm I think it will make a good bag or key charm.
My husband made a couple of points about making the handle more realistic so I am in the middle of creating another tennis racket... version 2 which I hope to finish tonight and post a picture of the result very soon.
Now I just need a tennis ball, any ideas?
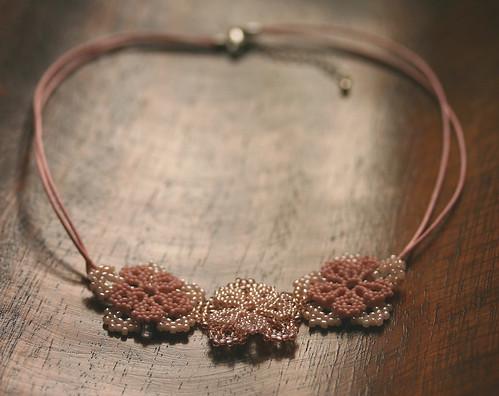
Finally I have finished some work in progress. I made the layered flowers into a necklace by attaching them to some waxed cotton cord with a lobster clasp extender fastening. I made this for a friend at work who was going on holiday to Florida this weekend.
 I then used some larger beads size 6 matsuno it said on the packet, and made a similar layered flower and finished it with a peachy pink 4mm glass pearl. I then threaded it onto memory wire with a mix of glass pearls and firepolished czech beads to create a matching bracelet. I was really happy with the design and as was my friend; so I am feeling very positive and can't wait to create some more floral designs.
 Please excuse the pictures, they are not the best as the lighting yesterday here was terrible and didn't improve all day. But I wanted to share them anyway.
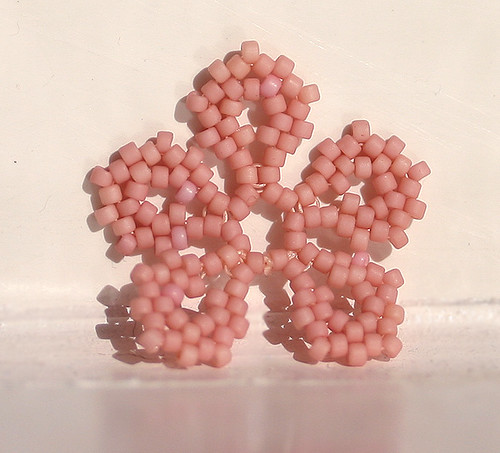
This title takes me back to my student days and a summer job where I was tasked with doubling up, where all I did for a whole shift was placing one piece of bread dough on top of the other and squashed them together. In the case below I have taken one peyote flower and put it on top of another to create a more firmer and structured flower compared to the single flowers in my last post.
 Mandy from Beads for Brains:365 asked me a couple of questions so I thought I would provide some more detail about these pieces for those interested. The peyote flowers are quite floppy but if you make another layer off set from the first layer this helps to make the piece more structured.
The flower above is made using light cream nymo thread and Ivory Cream Ceylon 11/0 Toho Seed Beads from beadservice for the base flower and size 15 silver lined opalesque jonquil beads (which I bought quite some time ago) from Fusion Beads for the inner flower. The base flower spans 30mm at its widest whilst the inner spans 20mm.
Finishing the flower with a central pearl or crystal would help keep its shape and if the petals have a tendancy to flip up or fold over just use a few well placed stitches to fix the inner layer to the base layer (clear thread would be better for making these more invisible).
Mandy from Beads for Brains:365 asked me a couple of questions so I thought I would provide some more detail about these pieces for those interested. The peyote flowers are quite floppy but if you make another layer off set from the first layer this helps to make the piece more structured.
The flower above is made using light cream nymo thread and Ivory Cream Ceylon 11/0 Toho Seed Beads from beadservice for the base flower and size 15 silver lined opalesque jonquil beads (which I bought quite some time ago) from Fusion Beads for the inner flower. The base flower spans 30mm at its widest whilst the inner spans 20mm.
Finishing the flower with a central pearl or crystal would help keep its shape and if the petals have a tendancy to flip up or fold over just use a few well placed stitches to fix the inner layer to the base layer (clear thread would be better for making these more invisible).
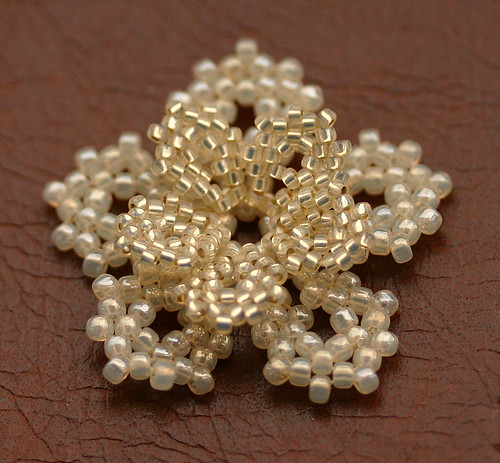
I've been dipping into Liz Thornton & Jill Devons book The Beaders Floral once again. I love this book especially the peyote flowers they are so dainty and easy to make. The one below is done using toho size 15 seed beads in matt pastel pink from Robins Beads.
I was so happy with this one I decided to make a few more in a range of pinky peachy colours and using size 11 matsuno seed beads (these beads have been sat unused for some time so where they came from... your guess is good as mine).
I plan to make a few more for my master plan, which I hope to share soon once completed.
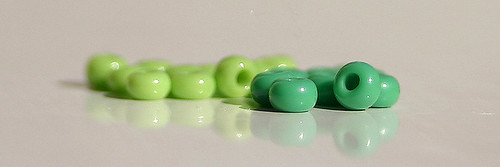
My favourite blog is Operation Tackle That Bead Stash it is full of information and inspiration for bead mad people like myself. Each month they have a mood board and invite all to create something inspired by the colour and the images they provide. May's mood board is shades of green. This month I am working towards participating as I struggle with green as I seem to have quite a few green beads which I never use.
On viewing the mood board one of the images struck a chord with me. I have some lovely green czech seed beads from my local bead shop.
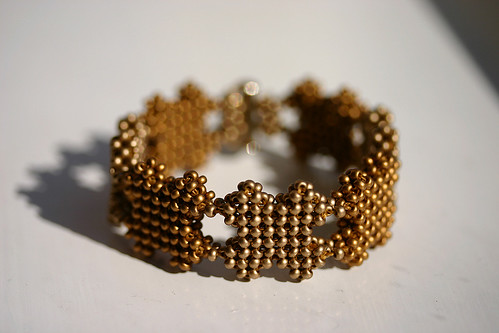
 One of my favourite bead weaving techniques is 3D Right Angle Weave (RAW). The bracelet below is one of my 3D triumphs which I love the feel of as the crosses are so sturdy so different to how the material type feel you get when weaving a flat sheet of RAW.
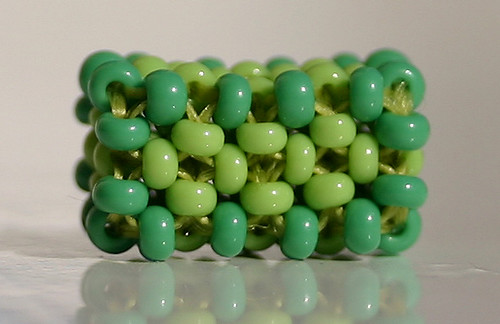
And here is the work in progress I haven't done much so hopefully I will complete it before the end of the month.
One of my favouring all time beading stitch is right angle weave (RAW) especially using it to create 3D pieces. When beading a bracelet of crosses last year my husband glance over and for a moment he thought they were little dogs. He then asked me could I do a scottie dog? So as always keen for a challenge I picked up my needle, thread and beads and suprisingly came out with something similar to this little guy below who is 2nd generation.
My friends mum saw my phone charm (the original) and thought it would be a great little gift for a friend of hers. I used size 8 seed beads in this one and the chunky little red guy below but it looks great using size 11 too.